INSTRUCTIONS
Materials
x Yarn colors: red, black , beige and brown
x 3mm crochet hook
x Embroidery needle
x Black embroidery thread
x Stuffing
x 9 mm safety eyes
x Pins
x Stitch markers
x Craft glue
x 38 cm (15”) of thick aluminum wire
Stitches
Chain, slip stitch, single crochet, half double
crochet, double crochet, treble crochet and double
treble crochet
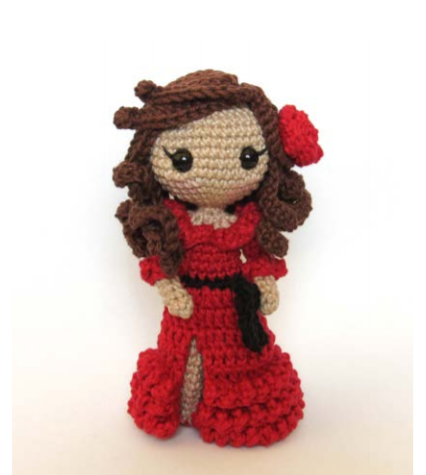
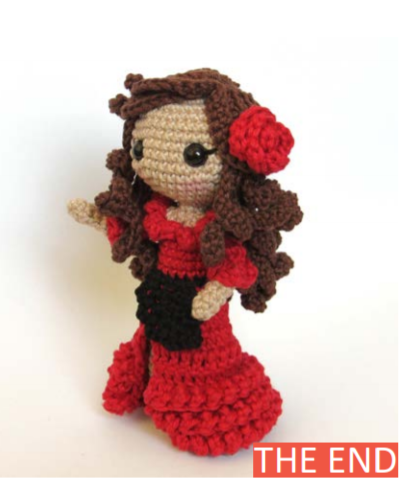
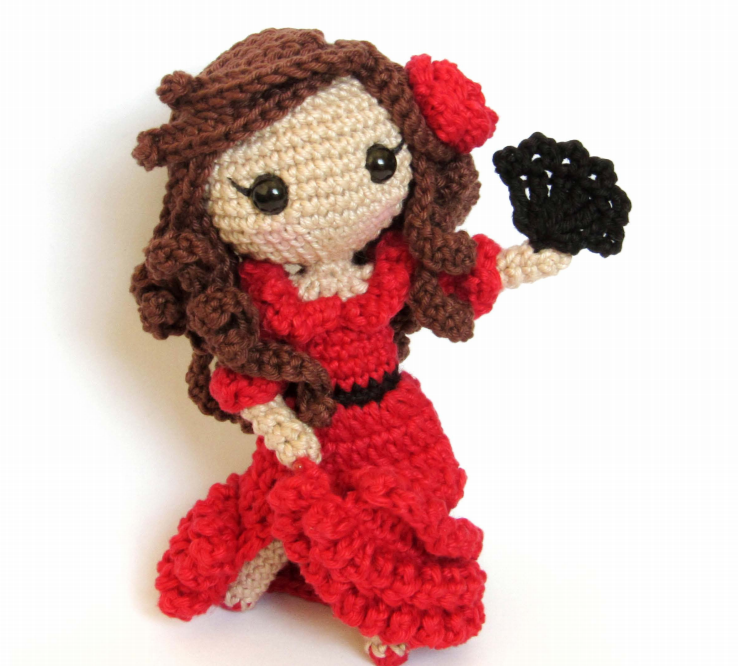
Finished doll size aprox 16cm (6,2”)
Abbreviations
inc increase
dec decrease
ch chain
slst slip stitch
sc single crochet
hdc half double crochet
dc double crochet
tr treble crochet
dtr double treble
{ } repetition of a sequence
[ ] total number of stitches
The doll is made starting from the bottom up,
in continuous rounds. Place a stitch marker at
the beginning of every new round to know where
it starts
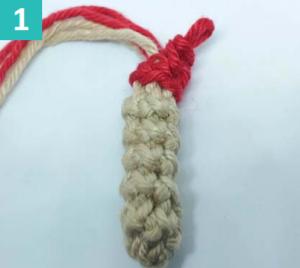
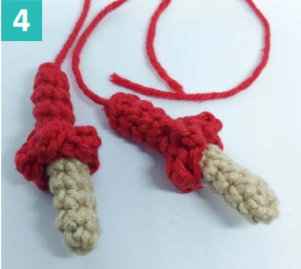
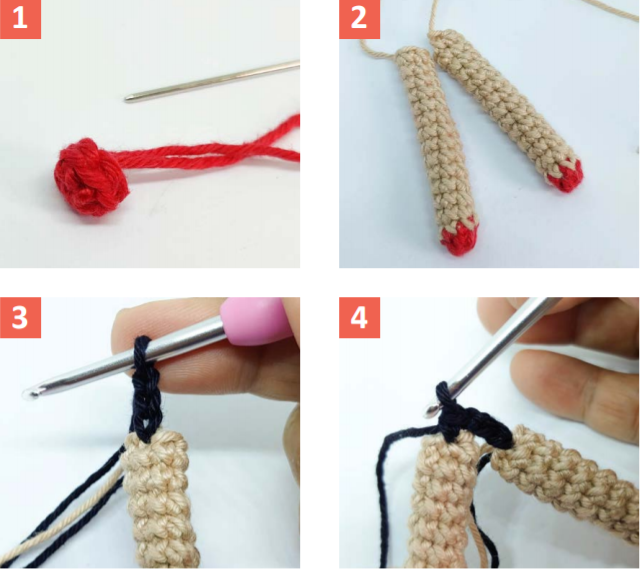
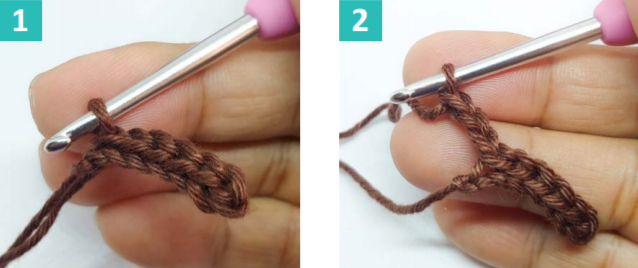
ARMS
beige and red – slip stitch, single crochet, half double crochet and treble crochet – make two
5 sc in magic ring
Sc around [5]
Change color to red
Slst 5 (pic 1)
5 sc in back loops only [5]
Sc around [5]
Fasten off, repeat for the second arm.
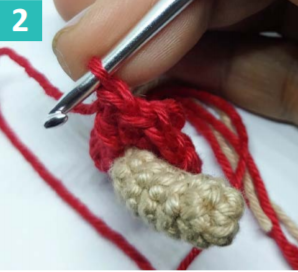
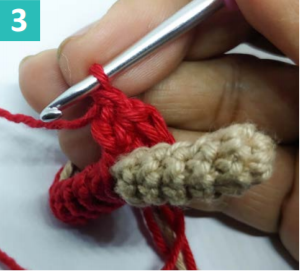
RUFFLES
Obs.: the wrong side of the ruffles
should be showing.
Join yarn on round 6, make 1 tr and 1 hdc in
each loop (pics 2 & 3).
Fasten of
LEGS AND BODY
red, beige and black – single crochet
LEGS
Start with red
6 sc in magic ring. Close the circle so the color
change will be less noticeable (pic 1)
Change color to beige
Sc around [6]
Fasten off. Don’t stuff.
Repeat for the second leg (pic 2).
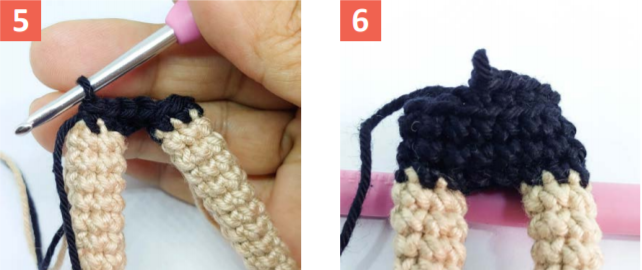
BODY
Attach black yarn into one of the legs with a
slst (pic 3), ch 2 (pic 4), 6 sc on the first leg,
2 sc on the chains, 6 sc on the other leg (pic 5),
2 sc on the other side of the chains [16]
Sc around [16]
Sc around in back loops only [16] (pic 6)
Change color to red
Sc around [16]
Dec, 6 sc, dec, 6 sc [14]
Sc around [14]
Don’t stuff.
Pause the work to make the skirt before joining
the arms. Leave a long tail to continue the body
later (around 1,5m – 60”).
SKIRT
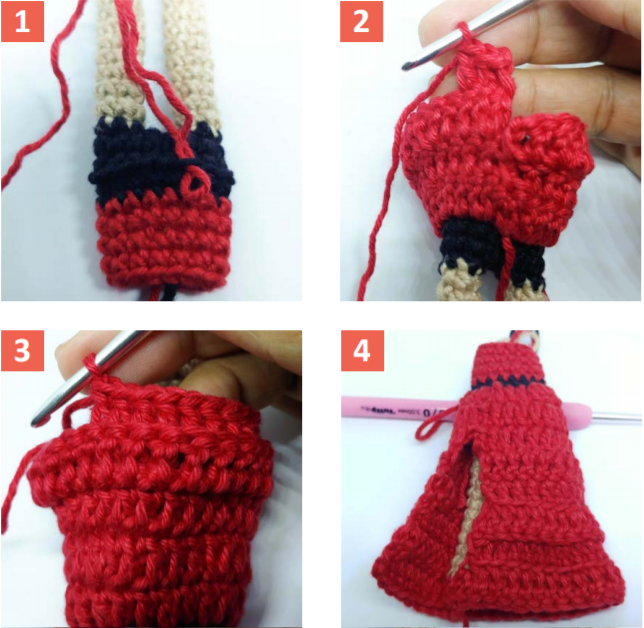
red – half double crochet, double crochet and treble crochet
Start on the front of the body, closer to the
right leg, using the front loops of round 19
(pic 1)
(3 dc, inc) around
(4 dc, inc) around
From now on, start working in rows, not
rounds (pic 2)
24 dc, turn
(5 dc, inc) around – using front loops only
(6 dc, inc) around – using back loops only (pic 3)
(7 dc, inc) around – using front loops only
Fasten off (pic 4).
RUFFLES
Obs.: the wrong side of the ruffles should
be showing, so they look bigger, with more
volume.
On rounds 6, 7 and 8, work 1 tr and 1 hdc in
each loop, on the last stitch, work only 1 hdc
(pics 5 & 6).
Fasten off.

WIRE STRUCTURE
Fold 26cm of wire in half and twist the upper part
(pic 1).
Cut out 12cm of wire and bend it slightly (pic 2).
Fold the ends of the wire (pic 3).
Aluminum wires are very maleable and can be 3
found in craft or jewelry stores.
If you can’t find it, you can use galvanized wire,
sold in hardware stores, or pipe cleaners, which
you can also find in craft stores.

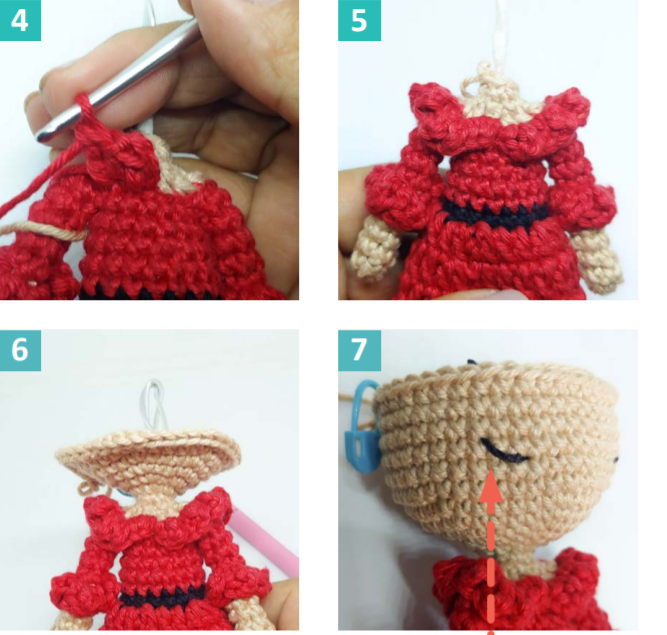
BODY – PART 2
red and beige – slip stitch, single crochet, half double crochet and treble crochet
3 sc, 5 sc on the left arm, 7 sc, 5 sc on the
right arm, 4 sc (pic 1) [24]
Insert the wires into the body and arms. Stuff
the body slightly.
Change color to beige
Dec around in back loops only [12] (pic 2)
Dec around [6]
Sc around [6] (pic 3)
Don’t fasten off. Continue to start the head.
Tip: wrap
tape around
the wire to
protect your
hook
CLEAVAGE
Obs.: the wrong side of the ruffles should
be showing.
Start on the front center:
Slst 1 and 1 hdc in the same stitch (pic 4),
skip 1 stitch, [1 tr and 1 hdc in the same stitch,
skip 1 stitch] x11, 1 hdc, slst 1 in the next
stitch. Fasten off (pic 5). 4 5
H E A D
beige – single crochet
Continue on round 23 of the body
Inc around [12]
(1 sc, inc) around [18]
(2 sc, inc) around [24]
(3 sc, inc) around [30]
(4 sc, inc) around [36]
(5 sc, inc) around [42] (pic 6)
Sc around [42]
Embroider eyelashes and insert eyes
between rounds 8 and 9, 8 stitches apart
(pics 7 & 8)
(5 sc, dec) around [36]
(4 sc, dec) around [30]
(3 sc, dec) around [24]
Start stuffing the head
(2 sc, dec) around [18]
Finish stuffing, if necessary
(1 sc, dec) around [12]
Dec around [6]
Close the opening with a tapestry needle.
Fasten off (pic 9).


H A I R
brown – chain, slip stitch and single crochet
BASE
Ch 7, go back with 6 slip stitches
Ch 3, attach to the base with a slst (pics 1 – 3)
From now on, start working on the strands, always
attaching the current strand to the base with a slst
before starting the next.
Important: work looser stitches so the hair will
have more volume and be more maleable
RIGHT SIDE
Ch 35, go back with 34 sc (pic 4)
Ch 30, go back with 29 sc
On the last chain:
ch 25, go back with 24 sc
ch 15, go back with 14 sc
LEFT SIDE
Ch 15, go back with 14 sc (pic 5)
Ch 25, go back with 24 sc
Ch 30, go back with 29 sc
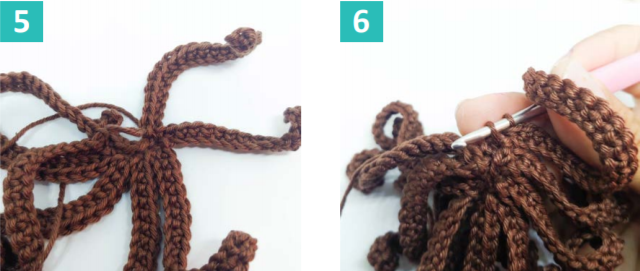
BACK
The strands should be made on the loop
created by the three chains (pic 6)
Ch 30, go back with 29 sc
Ch 31, go back with 30 sc
Ch 32, go back with 31 sc
Ch 33, go back with 32 sc
Ch 34, go back with 33 sc
Ch 35, go back with 34 sc
Fasten off.
Assembly
Pin the hair part 4 stitches above the left eye (pic 7).
Start pinning the strands, close together, starting on
the back (pic 8). Leave the first four strands on the
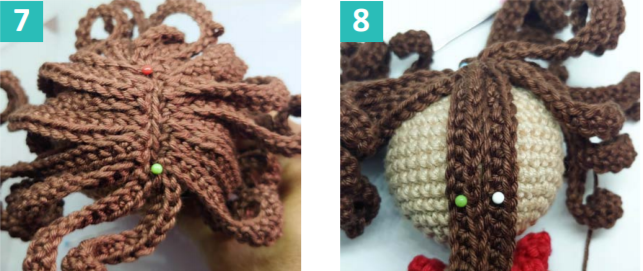
front center loose (pic 9).
Check the position of the wig, if everything is
correct, start to glue them in place, two at a time,
pinning them back in place until the glue dries.
Put the strand with 25 stitches over the others,
curving it slightly (pic 10).
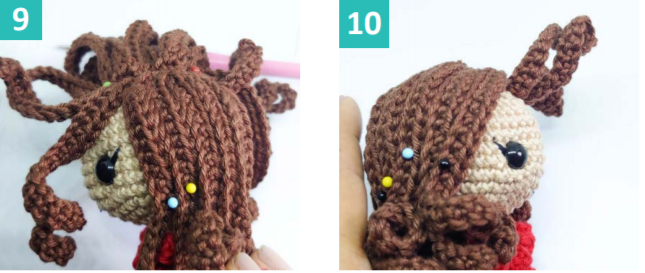
Glue the two smaller strands on the right side, also
curving them, and keeping the ends loose (pic 11).
Twist the last strand on the left side and glue it over
the others (pic 12).


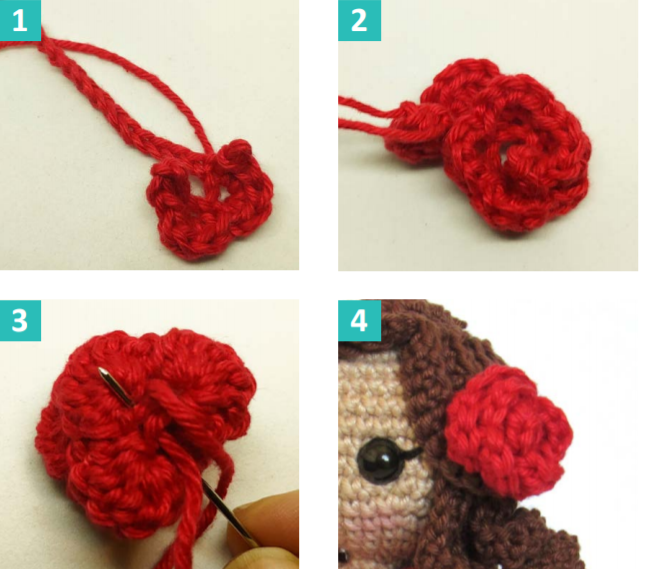
R O S E
red – chain, slip stitch, single crochet, half double crochet and double crochet
Ch 20
Skip 2, 1 sc, slst 1, 3 hdc in the next stitch, slst 1,
[4 hdc in the same stitch, slst 1] x2 [4 dc in the
same stitch, slst 1] x2, [5 dc in the same stitch,
slst 1] x3 (pics 1 – 3 and graph)
Fasten off and leave a tail for sewing.
Wrap the strand around itself, in a spiral (pics 2 & 3)
and hold it in place with a few stitches (pic 4).
Sew the rose on Carmen’s head..
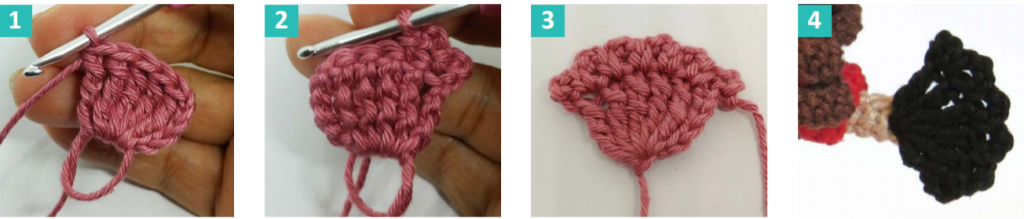
H A N D F A N
black – chain, slip stitch and double treble crochet
In the magic ring:
Ch 5, 5 dtr, turn (pic 1)
Slst 1, ch 3 in every stitch (pic 2).
Fasten off, close the ring (pic 3).
Sew the fan on Carmen’s hand (pic 4).