
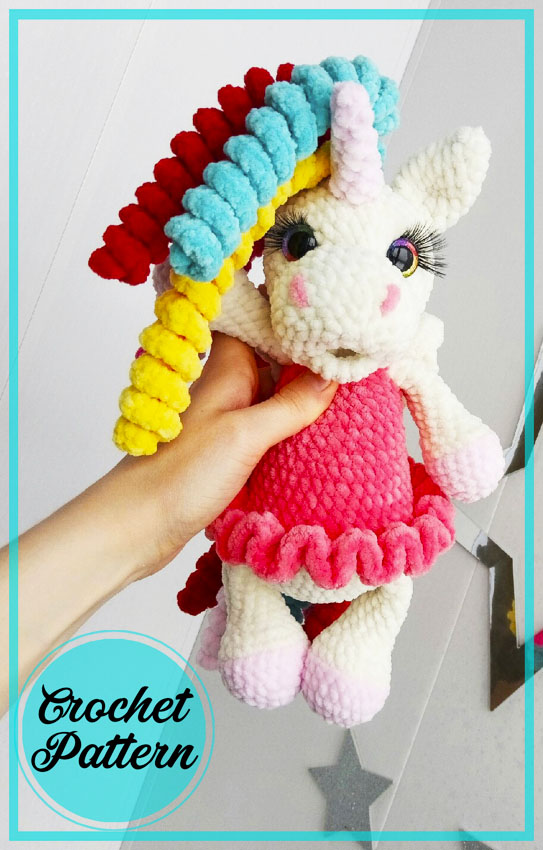
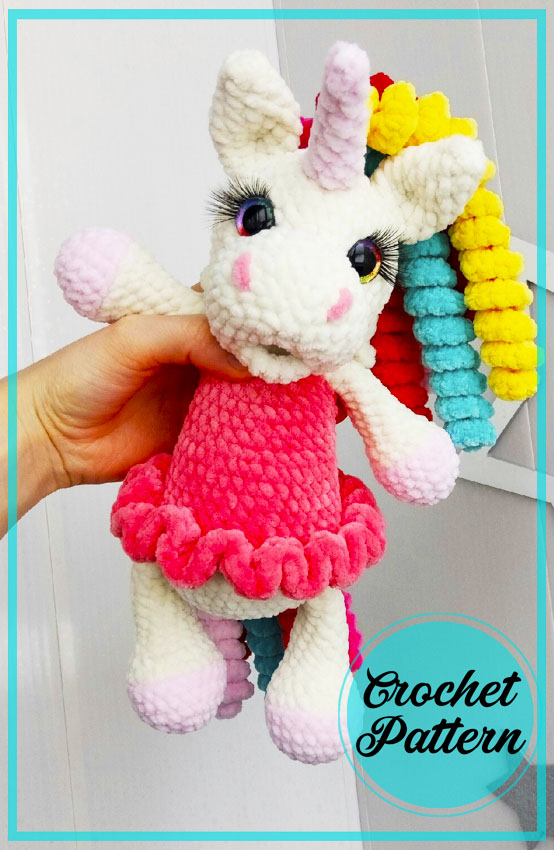
The author of the this unicorn free pattern is Regina Martyusheva.
The height of the alicorn without horn is 27-33 cm.
The size of the toy depends on the size of the hook, the density and knitting method, manufacturer and batch of yarn.
Difficulty: medium
This unicorn pattern is intended for personal use.
Designer: @amigu_rinka
Materials
Himalaya Dolphin Baby or analogues.
Body 80301: ≈100 gr.
Dress and bows 80346: ≈35 gr.
Hooves and horn 80313: ≈25 g.
Tail and mane 80306, 80307, 80319.
Nostrils 80319.
Cotton swab to strengthen the horn.
Filler. Holofiber: 90 gr.
Hook number 4. For the horn, hook number 3.
Eyes 16-18 mm. Black or colored.
Cilia. Used human invoices, 1.5 cm.
Waterproof glue for gluing eyelashes. Gel moment.
For embroidery of eyelids on the eyes. YarnArt Jeans, black.
For embroidery of proteins. Plush yarn, white.
Wide eye stitching needle
Abbreviations
AR – Amigurumi Magic ring
MR – Amigurumi Magic ring
App – application
ll – lift loop
sc : Single Crochet
inc : Increase
dec : Decrease
tr : Triple Crochet/ Treble Crochet
st: Stitch
dc : Double Crochet
hdc: Half Double Crochet
sl-st : Slip Stitch
ch : Chain
..in : make increase into same stitch as many as the number which is given in front of “inc” abbreviation (exp; 3inc, 4inc..).
FLO : Crochet into front loops only
BLO : Crochet into back loops only
BL : Bobble Stitch – do 5dc all in the same stitch and then yarn over and pull through all the loops on your hook (the original loop + 1 loop for each partially completed dc).


Muzzle-head
Body color.
1.6 sc in MR or 2 ch, in 2nd loop from 6 sc hook
2. inc х 6 (12)
3. (1 sc, inc) х 6 (18)
4. 1 sc, inc, (2 sc, inc) х 5, 1 sc (24)
5. (5 sc, inc) х 4 (28)
6-7. 28 sc – 2 row
8. 6 sc, (2 sc, dec) х 4, 6 sc (24)
9. 9 sc, inc х 8, 7 sc (32)
10. 32 sc
11. 7 sc, (1 sc, inc) х 10, 5 sc (42)
12-16. 42 sc – 5 rows Insert eyes, with or without glued eyelashes, between 10 and 11 rows. At a distance of 6-7 sc.
17. (5 sc, dec) х 6 (36)
18. 36 sc
19. 2 sc, dec (4 sc, dec) х 5, 2 sc (30)
We start filling the part.
20. (3 sc, dec) х 6 (24)
21. 1 sc, dec (2 sc, dec) х 5, 1 sc (18)
22. (1 sc, dec) х 6 (12)
23. dec х 6
Cut the yarn.
Pull the hole off the front walls of the six hinges.
Fasten and hide the end of the yarn.
Registration
At this stage:
1 Let’s make an eye-tightening + a hole for the mouth.
2 Tie and sew on the mouth.
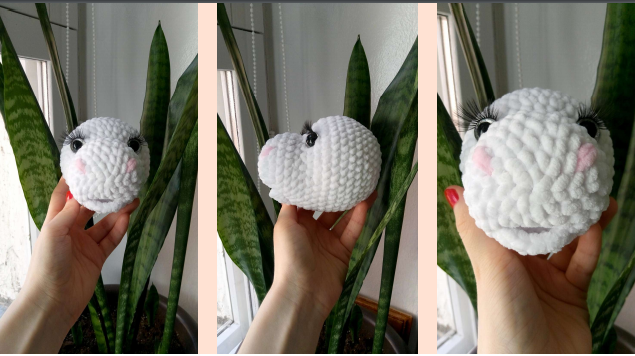
3 Embroider the nostrils. Two stitches. See photo 3. Beginning of stitch in the middle of 3rd row, at a distance of 7 sc. End of stitch in the middle of 5th row, 9 sc apart.
4 Let’s shape the eyes. Protein: plush yarn, white. Arrow: YarnArt Jeans, black.
Watch the video:
1 How to knit a mouth. How I glued my eyelashes.
2 How to make an eye-tightening + mouth hole.
3 How to sew a mouth.
Tap on the desired number – the video will open.
Body
It is more convenient to knit a skirt on an empty or half-empty body.
Therefore, do not fill the body or fill it just a little.
Body color.
1.6 sc in MR or 2 ch, in 2nd loop from 6 sc hook
2. inc х 6 (12)
3. (1 sc, inc) х 6 (18)
4. 1 sc, inc, (2 sc, inc) х 5, 1 sc (24)
5. (3 sc, inc) х 6 (30)
6. 2 sc, inc (4 sc, inc) х 5, 2 sc (36)
7. (5 sc, inc) х 6 (42)
8. (13 sc, inc) х 3 (45)
9-13. 45 sc – 5 ranks
Change the yarn to the color of the dress. Color change in the last sc of the 13th row. Row 14 begins with the color of the dress.
14. 45 sc.
15. (13 sc, dec) х 3 (42)
16. 6 sc, dec (12 sc, dec) х 2, 6 sc (39)
17-18. 39 sc – 2 row
19. (11 sc, dec) х 3 (36)
20. 5 sc, dec (10 sc, dec) х 2, 5 sc (33)
21-22. 33 sc – 2 row
23. (9 sc, dec) х 3 (30)
24. 4 sc, dec (8 sc, dec) х 2, 4 sc (27)
25-26. 27 sc – 2 row
27. (7 sc, dec) х 3 (24)
28-29. 24 sc – 2 row
30. 3 sc, dec (6 sc, dec) х 2, 3 sc (21)
31. (5 sc, dec) х 3, сс (18)
Cut the yarn and hide.
Fill in the detail when you knit the skirt.
Skirt
First option.
Dress color.
1.inc of sc x 45 (90)
2.slst into 1st chain, 2 lifting loops, (1 dc, inc from dc) x to end of row.
2 lifting loops count as the first dc. So in the next loop we knit an increase from dc.
Finally, knit slst into the first stitch of the second row.
Cut the yarn and pull out the loop.
We lower the yarn down through knitting to the second end of the yarn .
We tie together and hide.
See below for a detailed description of how to start knitting the first row of a skirt.
Second option.
Dress color.
1. inc из sc х 45 (90)
2.slst to 1st chain, 3 lifting loops, (1 tr, inc from tr) x to end of row.
3 lifting loops count as the first tr. So in the next loop we knit an increase from tr.
Finally, knit slst into the first stitch of the second row.
Cut the yarn and pull out the loop.
We lower the yarn down through knitting to the second end of the yarn .
We tie together and hide.
If knitting too tight, knit cc3n instead of tr.
We start knitting from the step where the yarn was changed to the color of the dress:
We introduce a crochet hook at the junction of colors
We pull out the yarn of the dress color and knit vp.
We insert the hook again in the same place for knitting and knit 1 sc – the first increase is obtained.
The red dots are the places where we insert and remove the hook to tie the increase.
Upper legs
Hoof color.
1.6 sc in MR or 2 ch, in 2nd loop from 6 sc hook
2. inc х 6 (12)
3. (1 sc, inc)х 6 (18)
4. (5 sc, inc)х 3 (21)
5. 21 sc in BLO
6. 21 sc
7. (5 sc, dec х 3) (18)
8. (1 sc, dec) х 6 (12)
With 9 row body color.
Fill in the piece as you knit.
9-18 . 12 sc – 10 рядов
19. (2 sc, dec) х 3 (9)
≈1 cm do not add filler.
Fold in half and knit 4 sc.
Leave for sewing.
Lower legs
Hoof color.
1.6 sc in MR or 2 ch, in 2nd loop from 6 sc hook
2. inc х 6 (12)
3. (1 sc, inc)х 6 (18)
4. 1 sc, inc, (2 sc, inc) х 5, 1 sc (24)
5. 24 sc за з.с.п.
6-7. 24 sc – 2 row
8. 1 sc, dec (2 sc, dec) х 5, 1 sc (18)
9. 18 sc
10. (2 sc, dec) х 4, dec (13)
With 11 row body color.
Fill in the piece as you knit.
11-20. 13 sc – 10 rows.
21.9 sc. We do not tie the row.
≈1 cm do not add.
Fold in half and knit 6 sc. Leave for sewing.
Wings
Body color.
1.4 ch, off 2nd st from hook: 2 sc, 3 sc in last st, 2 sc on reverse (7)
2. 3 sc, inc, 3 sc (8)
3. 4 sc, inc, 3 sc (9)
4. 5 sc, inc, 3 sc (10)
5. 6 sc, inc, 3 sc (11)
6. 6 sc, inc х 3, 2 sc (14)
7. 8 sc, inc х 2, 4 sc (16)
8. 9 sc, inc х 2, 5 sc (18)
9. 10 sc, inc х 2, 6 sc (20)
10. 10 sc, dec х 2, 6 sc (18)
11. 9 sc, dec х 2, 5 sc (16)
12. 8 sc, dec х 3, 2 sc (13)
13. dec х 2, 2 sc, dec х 2. We do not tie the row.
Do not fill the part. Fold in half and knit 4 sc.
Leave the yarn for sewing.
Horn
Watch the video on how to start knitting a horn correctly. To view, tap on the text.
If it is inconvenient to crochet # 4, change it to hook # 3.
Horn color.
1. Ka, sliding loop, 6 sc in MR.
Turn knitting to the other side.
2-4. 6 sc – 3 row
5. 2 sc, dec, 2 sc (5)
6-7. 5 sc – 2 row
8. 1 sc, dec, 2 sc (4)
9. 4 sc
10. 1 sc, dec, 1 sc (3)
11. 3 sc, slst
Cut the yarn .
Pull the hole off the front loops of the three loops.
Fasten and hide the yarn .
Insert a cotton swab until the end of the horn.
Fill the part with filler, where necessary. Loosely filling from the middle to the bottom.
Ears
Body color.
1.6 sc in MR or 2 ch, in 2nd loop from 6 sc hook
2. (1 sc, inc) х 3 (9)
3. (2 sc, inc) х 3 (12)
4-7. 12 sc – 4 row
8. 1 sc, dec х 5. We do not tie the row.
Do not fill.
Fold in half and knit 4 sc.
Leave the yarn to be pulled together and sewn on.
The second photo shows how to pull off the base of the ear.
Pass the needle in one direction, then in the opposite direction several times.
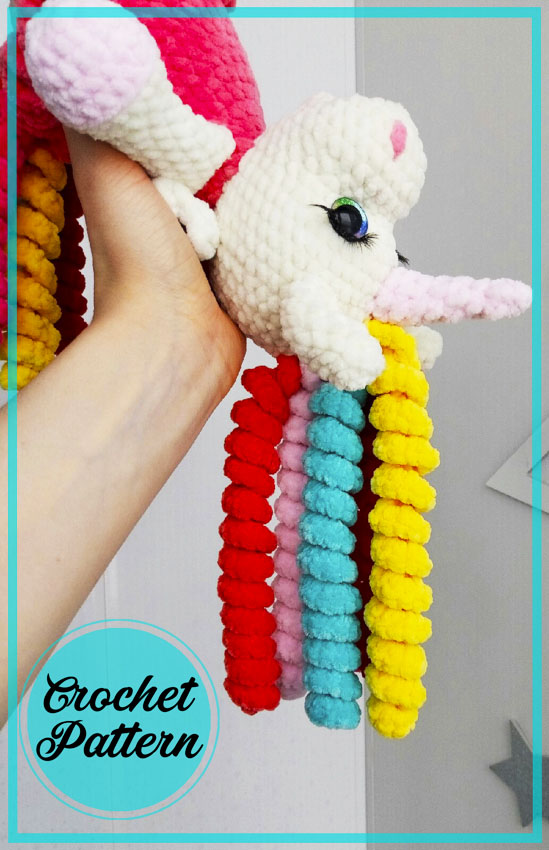
Mane and tail
Tail
1. ≈35 ch, from 2nd loop: dc, inc from dc.
4-6 spirals.
Mane
1. ≈55 ch, from 2nd loop: dc, inc from dc.
4-5 spirals.
Leave the yarns for sewing.
Two yarns should remain from one spiral for sewing. One remains at the beginning of knitting, the other is left at the end.
Assembly
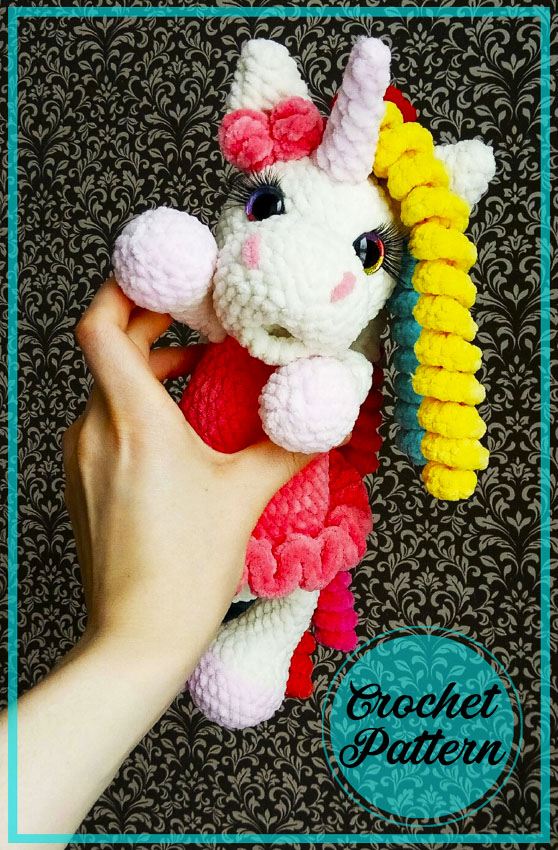
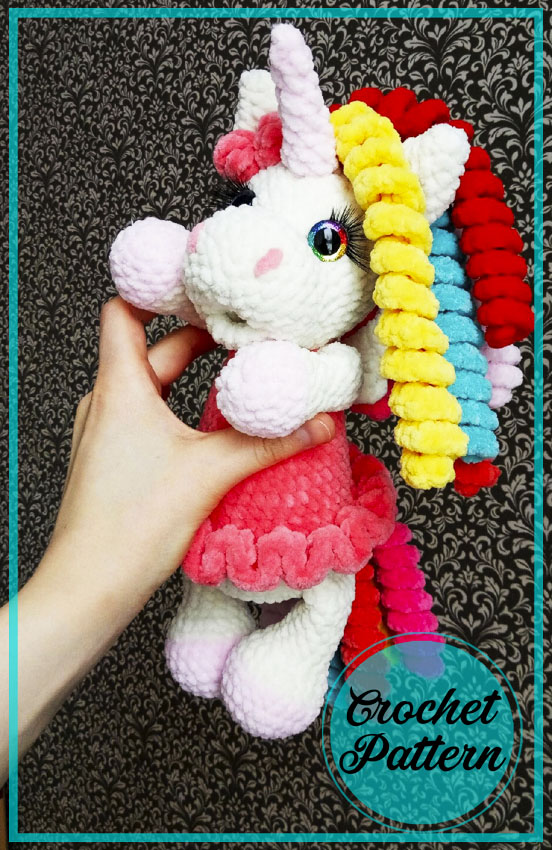
Sew the head to the body.
Sew on the upper legs, stepping back 1-2 rows from the head.
Sew on the lower legs between 7 and 9 row.
Sew on the wings. Watch the video. Circular sewing on the wings. Tap on the text.
Sew on the horn between 11 and 14 row.
Sew on ears between 15 and 18 side by side, 8-9 sc apart.
It is convenient to sew the ears in a circular way, like wings are sewn on.
Sew on the tail and then the mane. See the photo below.
The tail spirals are sewn in one place. Borders are marked with needles.
The spirals of the mane are sewn one under the other. End-to-end or, stepping back one row.
Bow
1.4 ch. Tie the first ch not tightly.
We will knit the following columns into it.
2.4 trtr in the first ch.
3.4 ch, slst in first ch, first chain.
We turn to knitting the second half of the bow.
Repeat the same from rows 1 to 3.
Wrap the ends of the yarns once in the middle of the bow.
Tie two knots on the back.
Cut and hide the ends of the yarns .
Cut off ≈25 cm of thin strong yarn to match the color of the bows.
I have it YarnArt Jeans, pink.
Tie tight around the bow and tie two knots.
Leave the remaining yarns for tying by the eyelet or legs.
Attention!
The master class is intended for personal use!
All rights reserved. Article 146 of the Criminal Code of the Russian Federation.
Prohibited full and partial copying, distribution, donation, resale, posting in the public domain.
When publishing a photo of a toy, add the phrase to the description:
“Connected by MK Regina Martyusheva”
@ regina.martiusheva – in VK
@amigu_rinka – on Instagram.
Let the creative energy be powerful and endless.
Inspiration and female happiness to you!
Take care of your golden hands of a beautiful needlewoman