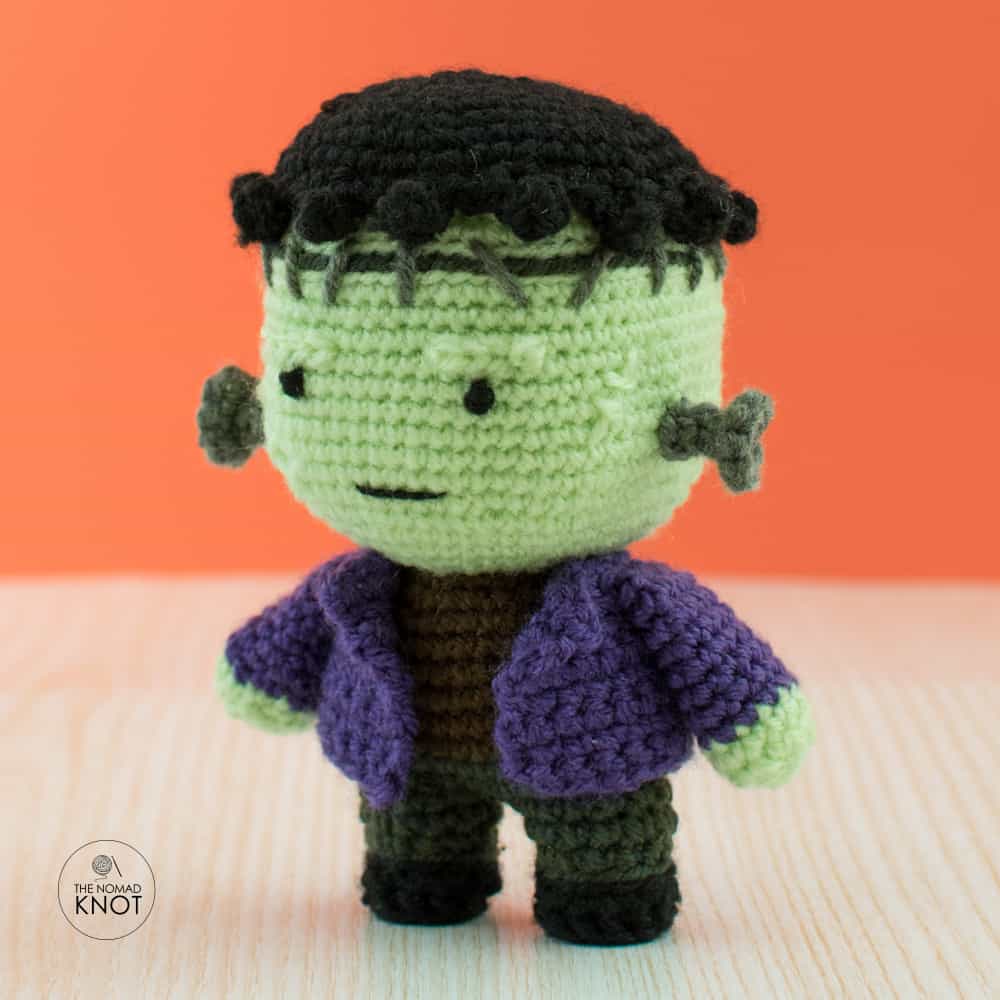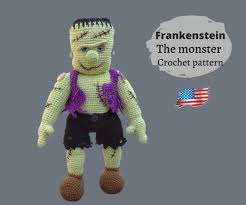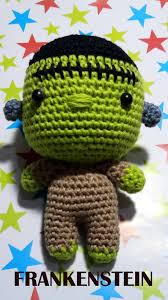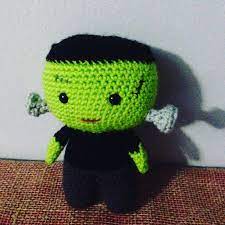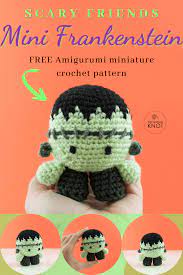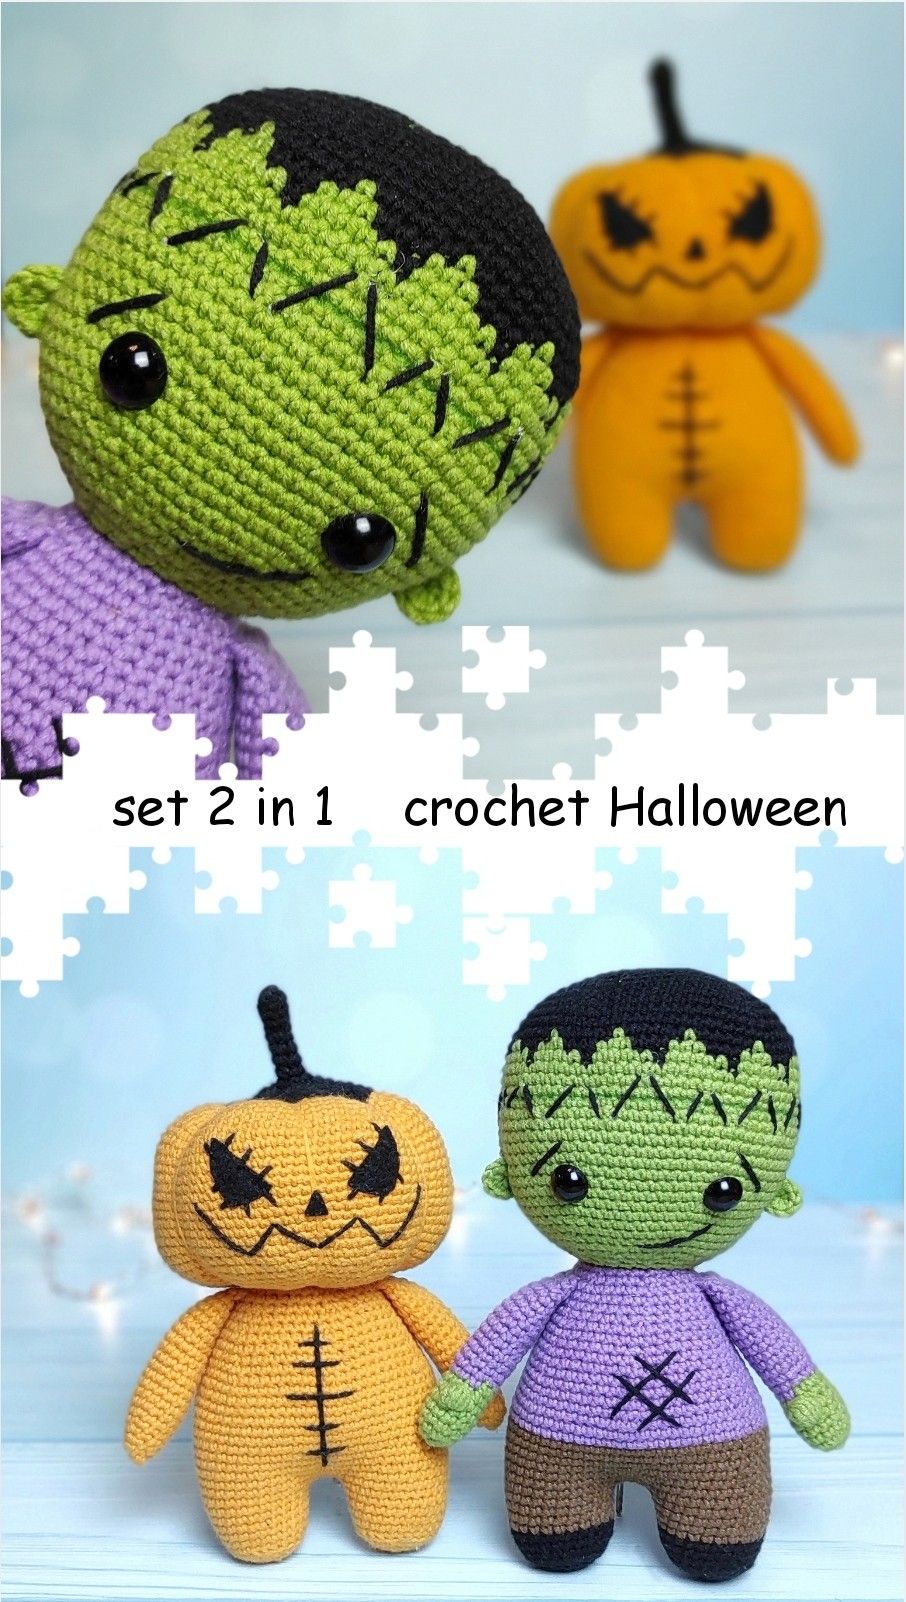
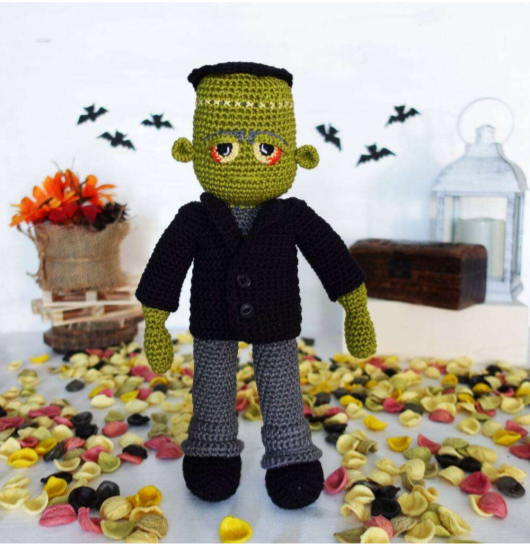
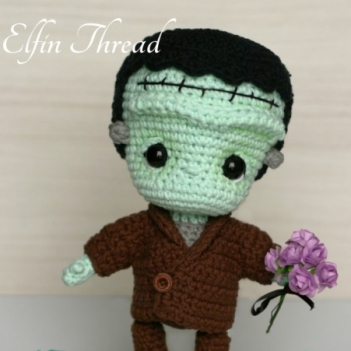
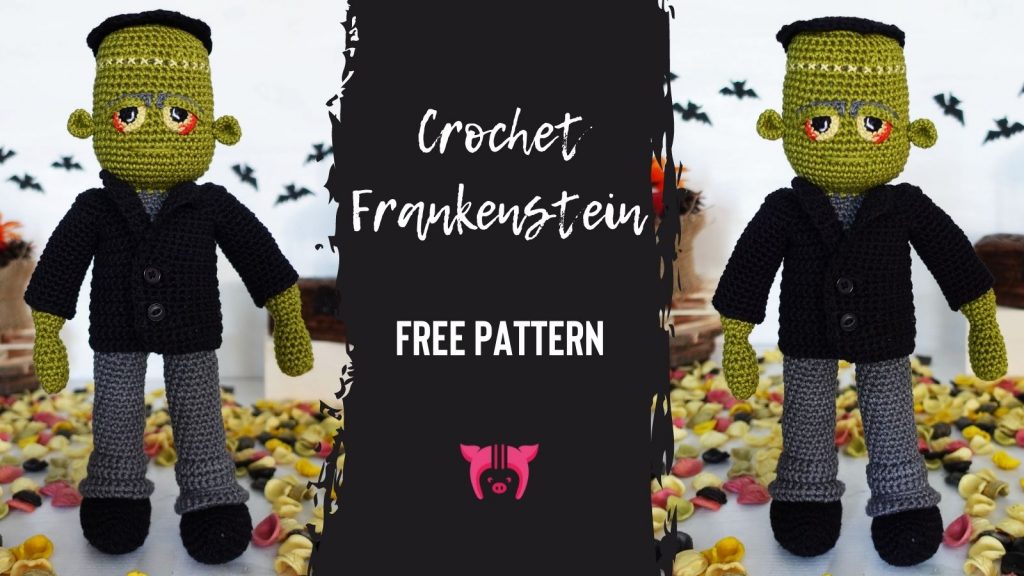
Believe it or not but I have never seen any of the Frankenstein movies. Neither did I read any of the books.
It’s just something that never really appealed to me, but paradoxically I used this iconic character quite a
few times in my art work. Today I’m introducing to you my brand new crochet Frankenstein pattern. Great
idea for Halloween or themed parties. Or simply something to make for all of those that love Frankie!
Supplies needed to complete crochet Frankenstein
Yarn for Frankenstein Pattern
For this project I used following yarns and quantities:
Vina-Hep Camilla
8152 Olive (‘green’) – 1 skein
8187 Light Turmeric (‘yellow’) – tiny bit
8198 Intensive Orange (‘orange’) – tiny bit
Yarn substitutes
If you cannot (or do not want to) use Catona or Camilla, then you can try to find a replacement. Based on
my experience I would recommend using Schachenmayr Catania, Patons Grace or Alize Bahar.
If you need a hand with choosing alternatives, then you may find my blog post on yarn weights useful.
Accessories
You will need following accessories:
Crochet hook: 3mm (US D-3) and 2mm (US B-1)
Scissors,
Stitch markers,
Toy stuffing, (Note: if you wish to explore some more options, including eco alternatives, then have
a look at my Stuffing for Toys blog post),
Tapestry needle,
Sewing needle,
2 small black buttons.
Frankenstein Pattern additional notes
TENSION/GAUGE
21 sts/25 rows = 10cm/4 inches square in single crochet
FINISHED MEASUREMENTS
32 cm (~ 13 inches) tall
15 cm (~ 6 inches) wide
8 cm (~ 3 inches) deep
ABBREVIATIONS
Mr – magic ring
Sc – single crochet
Inc – 2 in one
Decr – 2 together
Ch – chain
Slpst – slip stitch
Hdc – half double crochet
Dc – double crochet
NOTES
When working in rounds work continuously unless instructed otherwise.
For assembly utilize seamless joining method to make the toy look neater.
At the end of each row, in brackets, I included a number which represents the total number of
stitches in a given row. It should help tracking if instructions are followed.
Pattern Copyright Statement
Please do not copy, share, download or publicly display the pattern without permission of the author
(CottonNutty).
Should you wish to reuse it then please contact me at [email protected] to obtain permission.
We start with making arms. Then we will crochet leg cuffs and continue to crocheting legs. In the next step
we make the torso and head. Lastly, we make face details and hair, as well as create the jacket. Use 3mm
(US D-3) hook unless instructed otherwise.
Arms
Make 2 starting with green yarn. Stuff as you go.
Chain 6
Row 1: crochet around foundation chain, 4 sc, 3 sc in 1, 3 sc, inc (12)
Rows 2 through 7: 12 sc (12)
Row 8: 2 decr, 2 sc, 2 decr, 2 sc (8)
Row 9: 8 sc (8)
Row 10: 1 sc, inc, 3 sc, inc, 2 sc (10)
Row 11: 2 sc, inc, 4 sc, inc, 2 sc (12)
Row 12: 2 sc, inc, 5 sc, inc, 3 sc (14)
Rows 13 through 17: 14 sc (14)
Rows 18 and 19: 1 sc, decr, 6 sc, inc, 4 sc (14)
Rows 20 through 22: 14 sc (14)
Change yarn to grey
Rows 23 through 30: 14 sc (14)
Fasten off and leave tail for sewing

Cuffs
We need to make 2 cuffs, both in grey.
Chain 31
Row 1: beginning from the second chain from the hook 30 sc (30), ch1, turn
Row 2: decr, 26 sc, decr (28), ch1, turn
Rows 3 through 5: 28 sc (28), ch1, turn
Row 6: decr, 24 sc, decr (26), ch1, turn
Row 7: decr, 22, decr (24), ch1, turn
Row 8: decr, 20 sc, decr (22), ch1, turn
Row 9: decr, 18 sc, decr (20)
Fasten off and leave longer tail for sewing
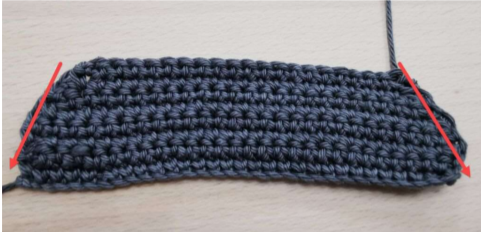
Sew along shorter edges (marked with red arrows on the image). Don’t cut yarn tail yet as we’ll use it later
on.
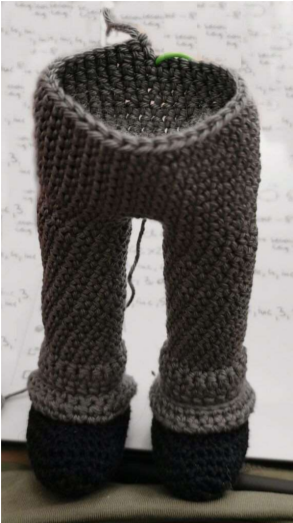
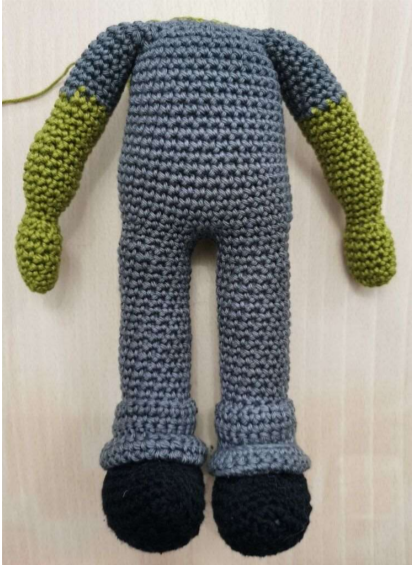
Legs
Make 2 starting with black yarn. Stuff as you go.
Chain 9
Row 1: beginning from the second chain from the hook 8 sc (8), ch1, turn
Rows 2 through 10: 8 sc (8), ch1, turn
Row 11: decr, 6 sc (7), ch1, turn
Row 12: decr, 5 sc (6), ch1, turn
Row 13: decr, 4 sc (5), ch1, turn
Row 14: decr, 3 sc (4), ch1, turn
Row 15: decr, 2 sc (3), ch1, turn
Row 16: decr, 1 sc (2), ch1, turn
Row 17: decr (1)
From now on start crocheting around. That is after completing row 17, start working around, going counter
clockwise.
Rows 18 through 20: 40 sc (40)
Row 21: 3 sc, decr, 10 sc, decr, 6 sc, decr, 10 sc, decr, 3 sc (36)
Row 22: 2 decr, 10 sc, decr, 4 sc, decr, 10 sc, 2 decr (30)
Row 23: 2 decr, 2 sc, decr, 6 sc, decr, 6 sc, decr, 2 sc, 2 decr (23)
Row 24: 3 decr, 5 sc, decr, 4 sc, 3 decr (16)
Row 25: 16 sc (16)
Change yarn to grey
Rows 26 through 45: 20 sc (20)
For the first leg – fasten off. For the second – don’t finish as we will continue to making the rest of the body.
At this stage also attach pant cuffs – just slide them onto the legs and shape. If you wish you may also sew it
here and there to fix the position but this shouldn’t be absolutely necessary in this Frankenstein pattern.
Body
Continue from the previous step. Stuff as you go.
Make 4 more single crochet stitches onto the second leg then chain 5. Afterwards join to the top row of the
second leg by making single crochet, doesn’t matter where exactly as long as both legs face same direction.
Important note: this stitch is the very first stitch of the row number 46.
Rows 46 and 47: 42 sc (42) [Note: 42 = 2 x 16 for both legs plus 2 x 5 on both sides of the chain in
between]
Row 48: decr, 3 sc, inc, 4 sc, inc, 4 sc, decr, 3 sc, decr, 4 sc, inc, 4 sc, inc, 3 sc, decr, 5 sc (42)
Row 49: decr, 3 sc, inc, 4 sc, inc, 5 sc, 3 decr, 4 sc, inc, 5 sc, inc, 3 sc, 3 decr (39)
Rows 50 through 65: 39 sc (39)
Now we will attach arms. This part of the Frankenstein pattern is a bit challenging but I’m sure you can
make it!
Take 4 stitch markers and use them to hold the position of arms. Take a look at the images below. From
where you are after finishing row 65 and looking from the top, count 10 stitches to the right and 6 to the left.
Those are your starting points for attaching both arms. Then using yarn tails from arms, sew 5 stitches of
arm and body row 65 together.
In the next row crochet around the body and arms – you should now have 47 stitches. 6 plus 10 plus
13 ‘left’ from the row 65 of the body plus 9 stitches for each arm.
Row 66: 47 sc (47)
Row 67: 9 sc, decr, 3 sc, decr, 2 sc, decr, 11 sc, decr, 3 sc, decr, 2 sc, decr, 5 sc (41)
Row 68: * 2 sc, decr * repeat 10 times, 1 sc (31)
Row 69: * 1 sc, decr * repeat 10 times, 1 sc (21)
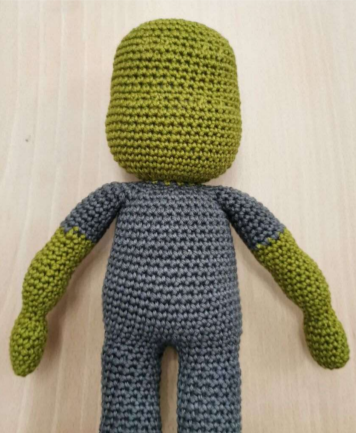
Now change color to green.
Row 70: * 1 sc, decr * repeat 7 times (14)
Crochet Frankenstein head
Continue from the previous step.
Row 71: * 1 sc, inc * repeat 7 times (21)
Row 72: 21 inc (42)
Row 73: 15 sc, inc, 19 sc, inc, 6 sc (44)
Row 74: 18 sc, inc, 15 sc, inc, 9 sc (46)
Rows 72 through 82: 46 sc (46)
Row 83: 20 sc, inc, 2 sc, decr, 1 sc, decr, 3 sc, decr, 1 sc, decr, 2 sc, inc, 7 sc (44)
Rows 84 through 87: 44 sc (44)
Row 88: 23 sc, inc, 1 sc, inc, 4 sc, inc, 1 sc, inc, 11 sc (48)
Row 89: 48 sc (48)
Row 90: 25 sc, decr, 1 sc, decr, 3 sc, decr, 1 sc, decr, 10 sc (44)
Rows 91 through 93: 44 sc (44)
Row 94: * 2 sc, decr * repeat 11 times (33)
Row 95: * 1 sc, decr * repeat 11 times (22)
Row 96: 11 decr (11)
Row 97: 5 decr, 1 sc (6)
Fasten off and close the gap. Weave in yarn tail.
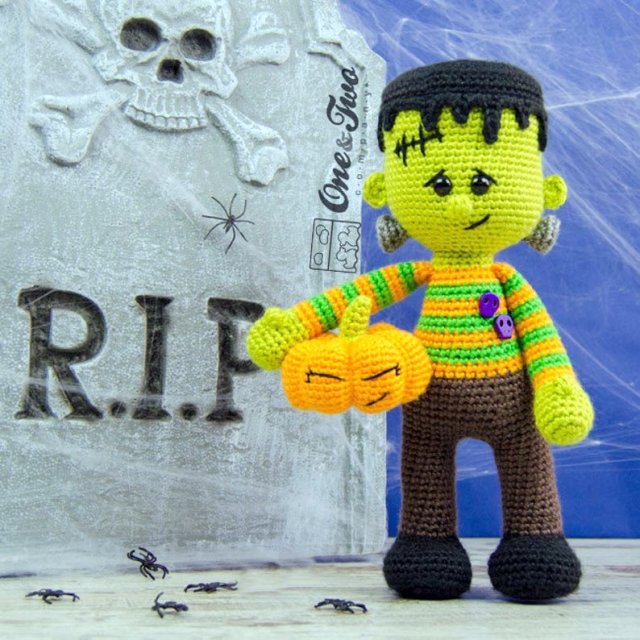
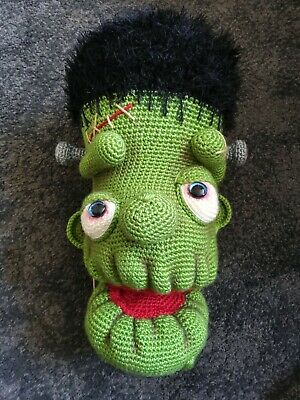
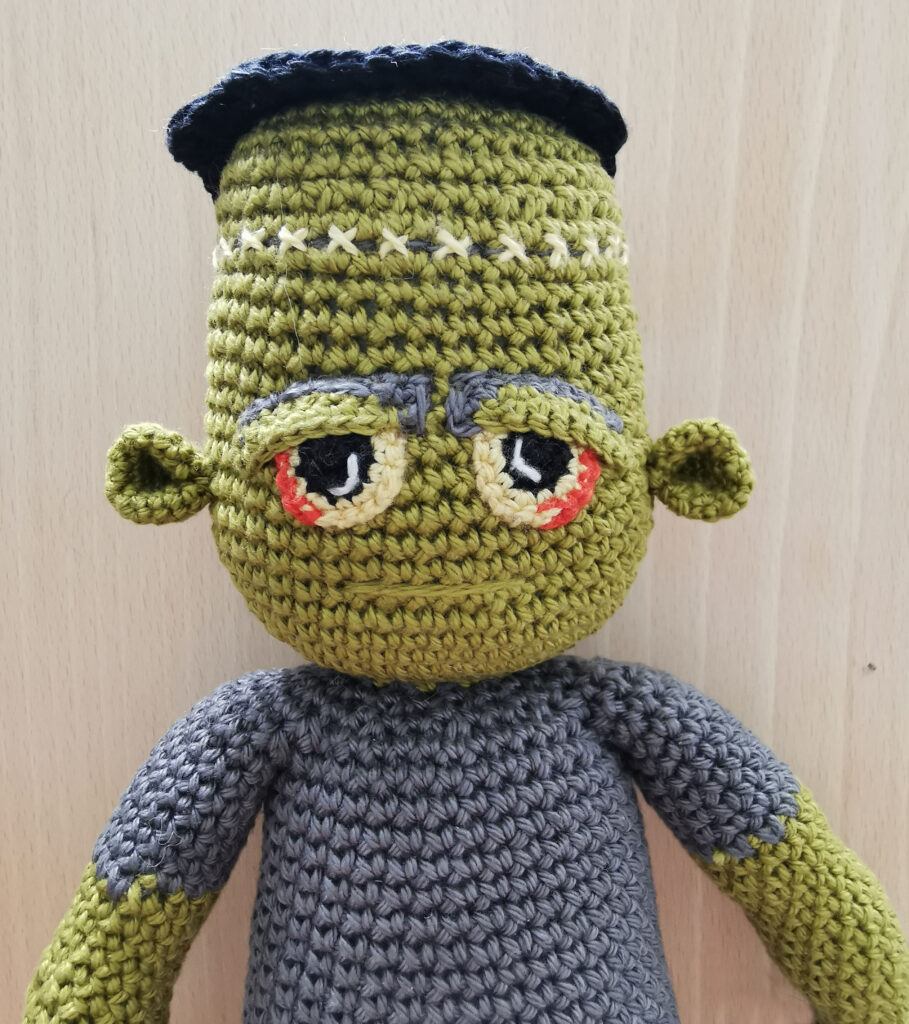
Frankenstein pattern – head details
Now we will make and add some head details. Some of those (where noted) are made with 2 mm (US B-1).
Additionally, when we use the smaller hook, we also use ‘half’ of the yarn. What do I mean by this? Simply
we need to split the yarn in half to make it thinner and suitable for working with the 2 mm hook. Therefore,
take 2 out of four strands that each yarn is made of and you are done!
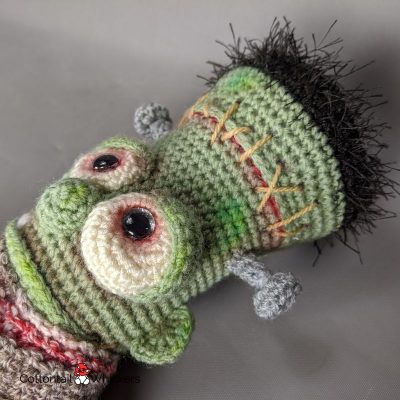
Eyes
We make left and right eyes slightly differently. Use 2 mm hook and ‘half’ of the yarn. Start with black.
Once you finish, attach the eyes onto the head, somewhere slightly below the middle point. If you are not
sure then images below show the details. Lastly, for each color leave yarn tail as we want to sew in that
given piece using its color.
Right Eye
6 in mr
Row 1: 6 inc (12)
Change to yellow, from now on we no longer crochet around but turn at the end of each row
Row 2: * 1 sc, inc * repeat 4 times (12), ch 1, turn
Row 3: 7 slpst, change to orange, 4 sc, 1 slpst (12)
Fasten off and leave tail for sewing
Left Eye
6 in mr
Row 1: 6 inc (12)
Change to yellow, from now on we no longer crochet around but turn at the end of each row
Row 2: * 1 sc, inc * repeat 4 times (12), ch 1, turn
Row 3: Change to orange, 5 sc, change to yellow, 7 slpst (12)
Fasten off and leave tail for sewing
Using white yarn embroider white lines or dots to imitate shining.
Eyebrows
We need to use 2 mm hook and ‘half’ of the yarn strands. Start with grey and make 2 of them. Similar to
what we have done for eyes, leave tails for sewing both for green color and for grey color.
Chain 10
Row 1: 1 sc, change to green, 8 sc (9), ch1, turn
Row 2: 8 sc, change to grey, 1 sc (9)
Fasten off
Once you have completed both eyebrows, attach eyebrows to the head, slightly twisted and overlapping with
the eyes (that is covering the top). Additionally, grey piece should be facing towards the top and the middle
– refer to the images below.
Ears
Make 2 using green yarn, 2mm hook and ‘half’ of the yarn strands.
6 sc in mr
Row 1: 6 inc (12)
Row 2: *1 sc, inc * repeat 6 times (18)
Rows 3 through 5: 18 sc (18)
Row 6: * 1 sc, decr * repeat 6 times (12)
Fasten off and leave tail for sewing
Now lay each ear flat and fold along the bottom edge. If it’s easier you can sew along that edge – I find it
more comfortable to attach later on. Afterwards attach each ear to the crochet Frankenstein head as shown
on the images below.
Hair
Use 3mm hook and full black yarn.
6 sc in mr
Row 1: 6 inc (12)
Row 2: * 1 sc, inc * repeat 6 times (18)
Row 3: * 2 sc, inc * repeat 6 times (24)
Row 4: * 3 sc, inc * repeat 6 times (30)
Row 5: * 4 sc, inc * repeat 6 times (36)
Row 6: * 5 sc, inc * repeat 6 times (42)
Row 7: * 6 sc, inc * repeat 6 times (48)
Row 8: * slpst, sc, hdc, dc, hdc, sc * repeat 8 times (48)
Fasten off and leave tail for sewing
Once finished, attach hair to the top of the head. Don’t sew the edges, but attach the middle part. Edges
should be left loose. At this stage of the Frankenstein pattern also embroider mouth, using half of the green
yarn.
Crochet Frankenstein head stitching
In order to embroider head stitching you need to do 2 things:
- Take half of the grey yarn and weave in the thread around the head, roughly 3-4 rows above the
eyebrows. - With half of the yellow yarn embroider crosses on top of the grey line made in step 1.
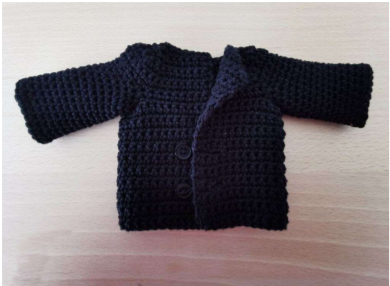
Jacket
This is the last step in the Frankenstein pattern. You are nearly there! We make jacket with 3mm hook and
full black yarn.
Chain 49
Row 1: beginning from the second chain from the hook 48 sc (48), ch1, turn
Rows 2 through 5: 48 sc (48), ch1, turn
Row 6: 2 sc, ch2, skip 2, 44 sc (48), ch1, turn [note: we are making button hole]
Rows 7 through 10: 48 sc (48), ch1, turn
Row 11: 44 sc, ch2, skip 2, 2 sc (48), ch1, turn [note: we are making button hole]
Rows 12 through 19: 48 sc (48), ch1, turn
Row 20: 9 sc, ch 11, skip 7, 16 sc, ch 11, skip 7, 9 sc (56), ch1, turn [note: here we create the holes
for jacket sleeves]
Rows 21 through 23: 56 sc (56), ch1, turn
Row 24: 6 sc, * 1 sc, decr * repeat 6 times, 8 sc, * 1 sc, decr * repeat 6 times, 6 sc (44), ch1, turn
Row 25: 6 sc, * 1 sc, decr * repeat 4 times, 8 sc, * 1 sc, decr * repeat 4 times, 6 sc (36), ch1, turn
Row 26: 6 sc, 4 decr, 3 sc, decr, 3 sc, 4 decr, 6 sc (27), ch1, turn
Row 27: 27 sc
Fasten off and weave in yarn tail
Sleeves
Work into the sleeve holes and crochet around. It doesn’t really matter in which stitch you start but typically
it’s best to start at the ‘corners’.
Rows 1 through 15: 18 sc
Row 16: * 5 sc, inc * repeat 3 times (21)
Fasten off and weave in yarn tail
And the very final step of the Frankenstein pattern – attach buttons and put the jacket onto the crochet
Frankenstein!
Tadah!!
And you are done! I really hope you enjoyed the pattern. And as always shoot me a note if you struggle with
anything.
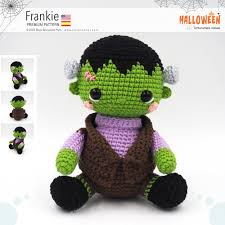
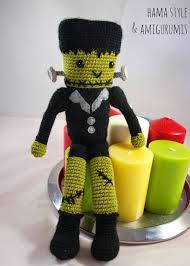
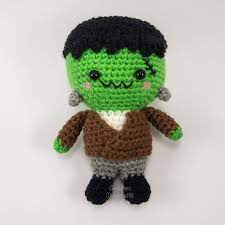
More Images;

OLYMPUS DIGITAL CAMERA